


Stable Diffusion是文本到图像的潜在扩散模型,它可以根据文本提示词生成对应的图像,应用于包括计算机视觉、数字艺术、视频游戏等多种领域和场景。目前国内云服务器商阿里云支持部署Stable Diffusion,本文就来为大家介绍使用AMD CPU实例部署Stable Diffusion,同时基于该模型搭建个人版文生图服务,仅供参考。
本文主要涉及的阿里云云服务:阿里云服务器
阿里云服务器是阿里云提供的性能卓越、稳定可靠、弹性扩展的IaaS级别云计算服务。提供丰富产品规格可选,包括经济型、通用算力型、轻量应用、通用型、计算型、内存型、大数据型、GPU型等,其中GPU型提供多种实例规格可选,适用于深度学习、科学计算、图形可视化、视频处理等多种应用场景。
点击进入:阿里云官网
一、创建阿里云云服务器实例
1、进入阿里云官网,注册并登录账号。
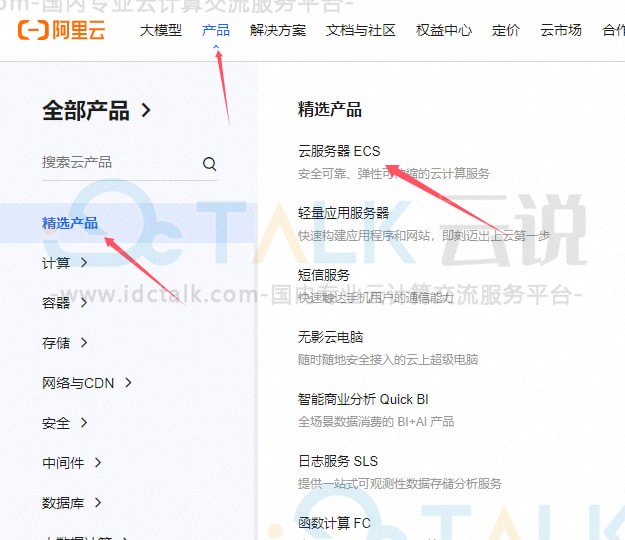
2、在以下页面点击“产品”>“精选产品”>“云服务器”,点击“立即购买”。

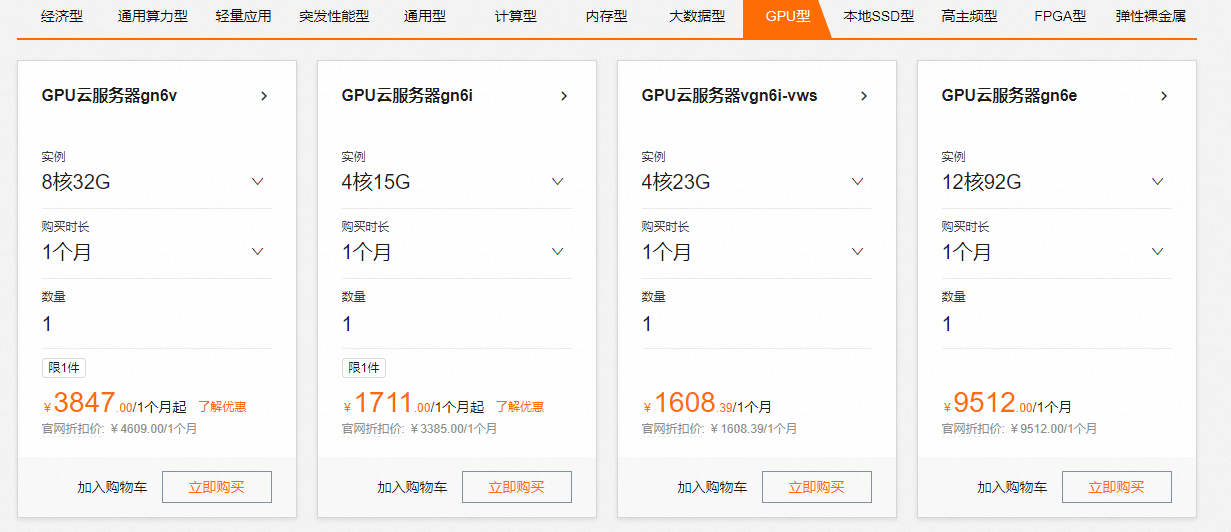
3、按照界面提示完成参数配置,创建一台云服务器实例。
- 实例:Stable Diffusion模型的推理过程需要耗费大量的计算资源,运行时占用大量内存,为了保证模型运行的稳定,实例规格至少需要选择ecs.g8a.16xlarge(256 GiB内存)。
- 镜像:Alibaba Cloud Linux 3.2104 LTS 64位。
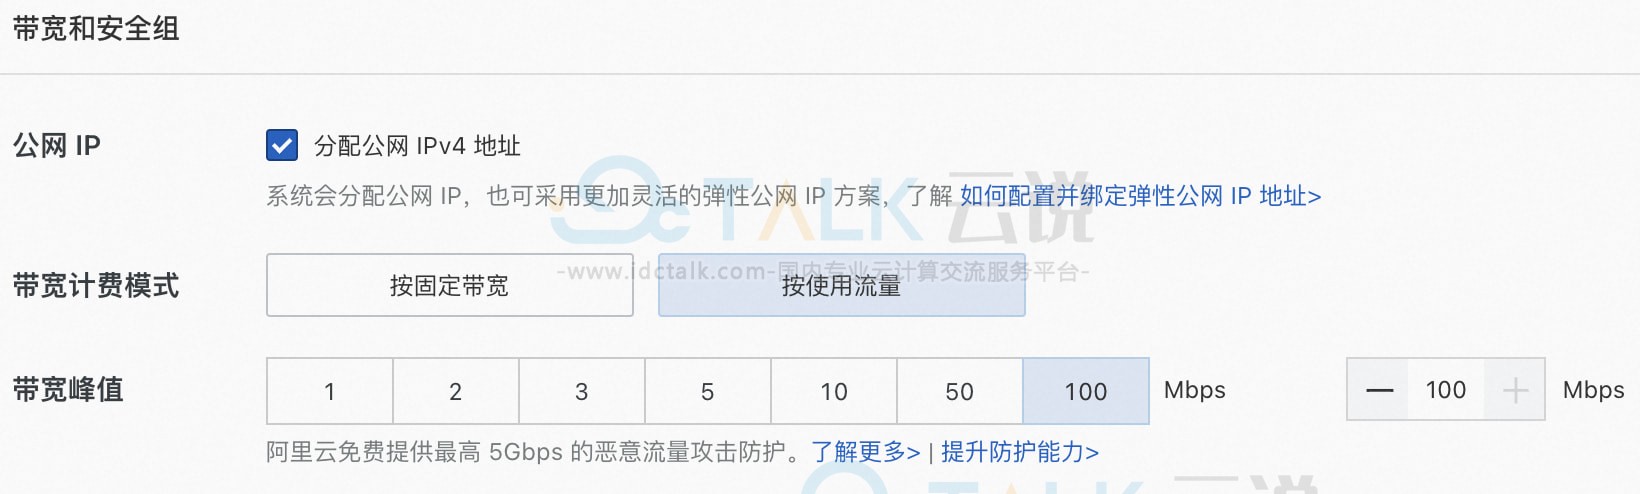
- 公网IP:选中分配公网IPv4地址,带宽计费模式选择按使用流量,带宽峰值设置为100 Mbps。以加快模型下载速度。
- 系统盘:Stable Diffusion的运行需要下载多个模型文件,会占用大量存储空间,为了保证模型顺利运行,建议系统盘设置为100 GiB。
4、添加安全组规则。
5、在云服务器实例安全组的入方向添加安全组规则并放行22、443、7860端口(用于访问WebUI服务)。
6、创建完成后,在云服务器实例页面,获取公网IP地址。

二、创建Docker运行环境
1、远程连接该云服务器实例。
相关推荐:《阿里云服务器三种远程连接的方法》
2、安装Docker。
执行以下命令安装Docker社区版本。
#添加Docker软件包源
sudo wget -O /etc/yum.repos.d/docker-ce.repo http://mirrors.cloud.aliyuncs.com/docker-ce/linux/centos/docker-ce.repo
sudo sed -i 's|https://mirrors.aliyun.com|http://mirrors.cloud.aliyuncs.com|g' /etc/yum.repos.d/docker-ce.repo
#Alibaba Cloud Linux3专用的dnf源兼容插件
sudo dnf -y install dnf-plugin-releasever-adapter --repo alinux3-plus
#安装Docker社区版本,容器运行时containerd.io,以及Docker构建和Compose插件
sudo dnf -y install docker-ce docker-ce-cli containerd.io docker-buildx-plugin docker-compose-plugin
#启动Docker
sudo systemctl start docker
#设置Docker守护进程在系统启动时自动启动
sudo systemctl enable docker
通过查看Docker版本命令,验证Docker是否安装成功。
sudo docker -v
如下图回显信息所示,表示Docker已安装成功。

3、创建并运行PyTorch AI容器。
龙蜥社区提供了丰富的基于Anolis OS的容器镜像,包括针对AMD优化过的PyTorch镜像,可以直接使用该镜像直接创建一个PyTorch运行环境。
以下命令首先拉取容器镜像,随后使用该镜像创建一个以分离模式运行的、名为pytorch-amd的容器,并将用户的家目录映射到容器中,以保留开发内容。
sudo docker pull registry.openanolis.cn/openanolis/pytorch-amd:1.13.1-23-zendnn4.1
sudo docker run -d -it --name pytorch-amd --net host -v $HOME:/root registry.openanolis.cn/openanolis/pytorch-amd:1.13.1-23-zendnn4.1
三、部署Stable Diffusion
阿里云同时提供手动部署和自动部署两种方式,用户可以按需选择。
手动部署
1、进入容器环境。
sudo docker exec -it -w /root pytorch-amd /bin/bash
2、安装部署Stable Diffusion所需的软件。
yum install -y git git-lfs wget tmux mesa-libGL gperftools-libs
3、启用Git LFS,下载预训练模型需要Git LFS的支持。
git lfs install
4、创建一个tmux session。
tmux
5、下载Stable Diffusion WebUI项目源码。
git clone -b v1.5.2 https://github.com/AUTOMATIC1111/stable-diffusion-webui.git
6、下载Stable Diffusion WebUI项目源码所需依赖模型。
mkdir stable-diffusion-webui/repositories && cd $_
git clone https://github.com/Stability-AI/stablediffusion.git stable-diffusion-stability-ai
git clone https://github.com/Stability-AI/generative-models.git generative-models
git clone https://github.com/crowsonkb/k-diffusion.git k-diffusion
git clone https://github.com/sczhou/CodeFormer.git CodeFormer
git clone https://github.com/salesforce/BLIP.git BLIP
7、将Stable Diffusion所需的依赖模型切换到指定分支,以保证生成结果的稳定。
git -C stable-diffusion-stability-ai checkout cf1d67a6fd5ea1aa600c4df58e5b47da45f6bdbf
git -C generative-models checkout 5c10deee76adad0032b412294130090932317a87
git -C k-diffusion checkout c9fe758757e022f05ca5a53fa8fac28889e4f1cf
git -C CodeFormer checkout c5b4593074ba6214284d6acd5f1719b6c5d739af
git -C BLIP checkout 48211a1594f1321b00f14c9f7a5b4813144b2fb9
8、下载Stable Diffusion预训练模型。
cd ~ && mkdir -p stable-diffusion-webui/models/Stable-diffusion
wget "https://www.modelscope.cn/api/v1/models/AI-ModelScope/stable-diffusion-v1-5/repo?Revision=master&FilePath=v1-5-pruned-emaonly.safetensors" -O stable-diffusion-webui/models/Stable-diffusion/v1-5-pruned-emaonly.safetensors
mkdir -p ~/stable-diffusion-webui/models/clip
git clone --depth=1 https://gitee.com/modelee/clip-vit-large-patch14.git ~/stable-diffusion-webui/models/clip/clip-vit-large-patch14
9、修改脚本文件,使Stable Diffusion运行时从本地调用ViT多模态模型。
sed -i "s?openai/clip-vit-large-patch14?${HOME}/stable-diffusion-webui/models/clip/clip-vit-large-patch14?g" ~/stable-diffusion-webui/repositories/stable-diffusion-stability-ai/ldm/modules/encoders/modules.py
10、更换pip下载源。
在安装依赖包之前,建议用户更换pip下载源以加速安装。
创建pip文件夹。
mkdir -p ~/.config/pip
配置pip安装镜像源。
cat > ~/.config/pip/pip.conf <<EOF
[global]
index-url=http://mirrors.cloud.aliyuncs.com/pypi/simple/

[install]
trusted-host=mirrors.cloud.aliyuncs.com
EOF
11、安装Python运行依赖。
pip install cython gfpgan open-clip-torch==2.8.0 httpx==0.24.1
pip install git+https://github.com/openai/CLIP.git@d50d76daa670286dd6cacf3bcd80b5e4823fc8e1
12、设置环境变量OMP_NUM_THREADS和GOMP_CPU_AFFINITY。
ZenDNN运行库需要针对硬件平台显式设置环境变量OMP_NUM_THREADS和GOMP_CPU_AFFINITY。
cd ~/stable-diffusion-webui
venv_dir="-" ./webui.sh -f --skip-torch-cuda-test --exit
13、运行脚本,自动化部署Stable Diffusion的运行环境。
cd ~/stable-diffusion-webui
venv_dir="-" ./webui.sh -f --skip-torch-cuda-test --exit
14、执行如下命令,开启WebUI服务。
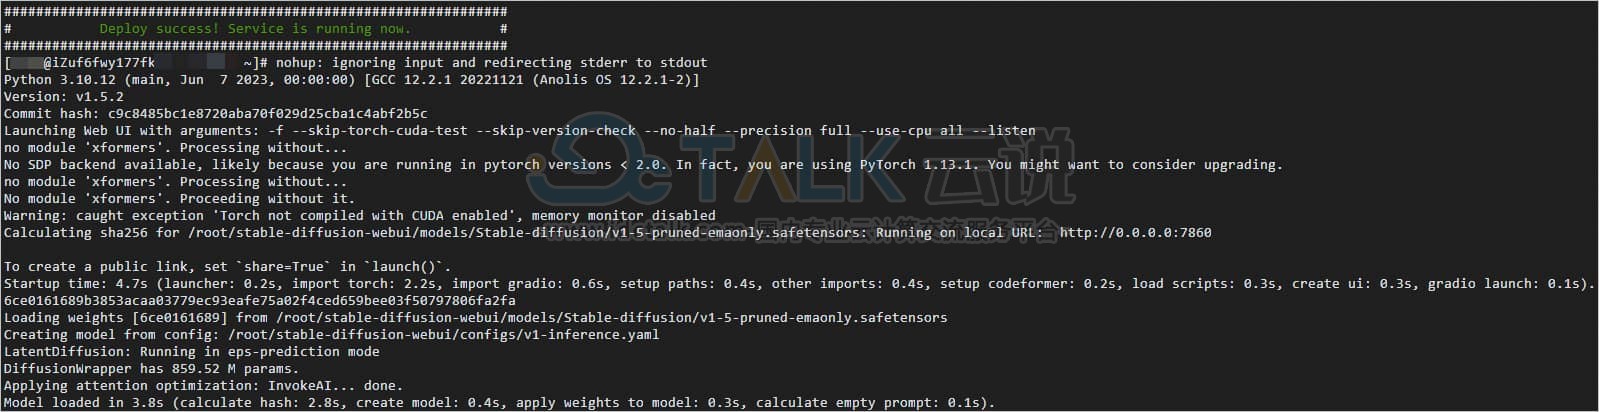
export LD_PRELOAD=/usr/lib64/libtcmalloc.so.4
export venv_dir="-"
python3 launch.py -f --skip-torch-cuda-test --skip-version-check --no-half --precision full --use-cpu all --listen
当出现如下信息时,表示WebUI服务启动成功。

15、在浏览器地址栏输入http://<ECS公网IP地址>:7860,进入Web页面。
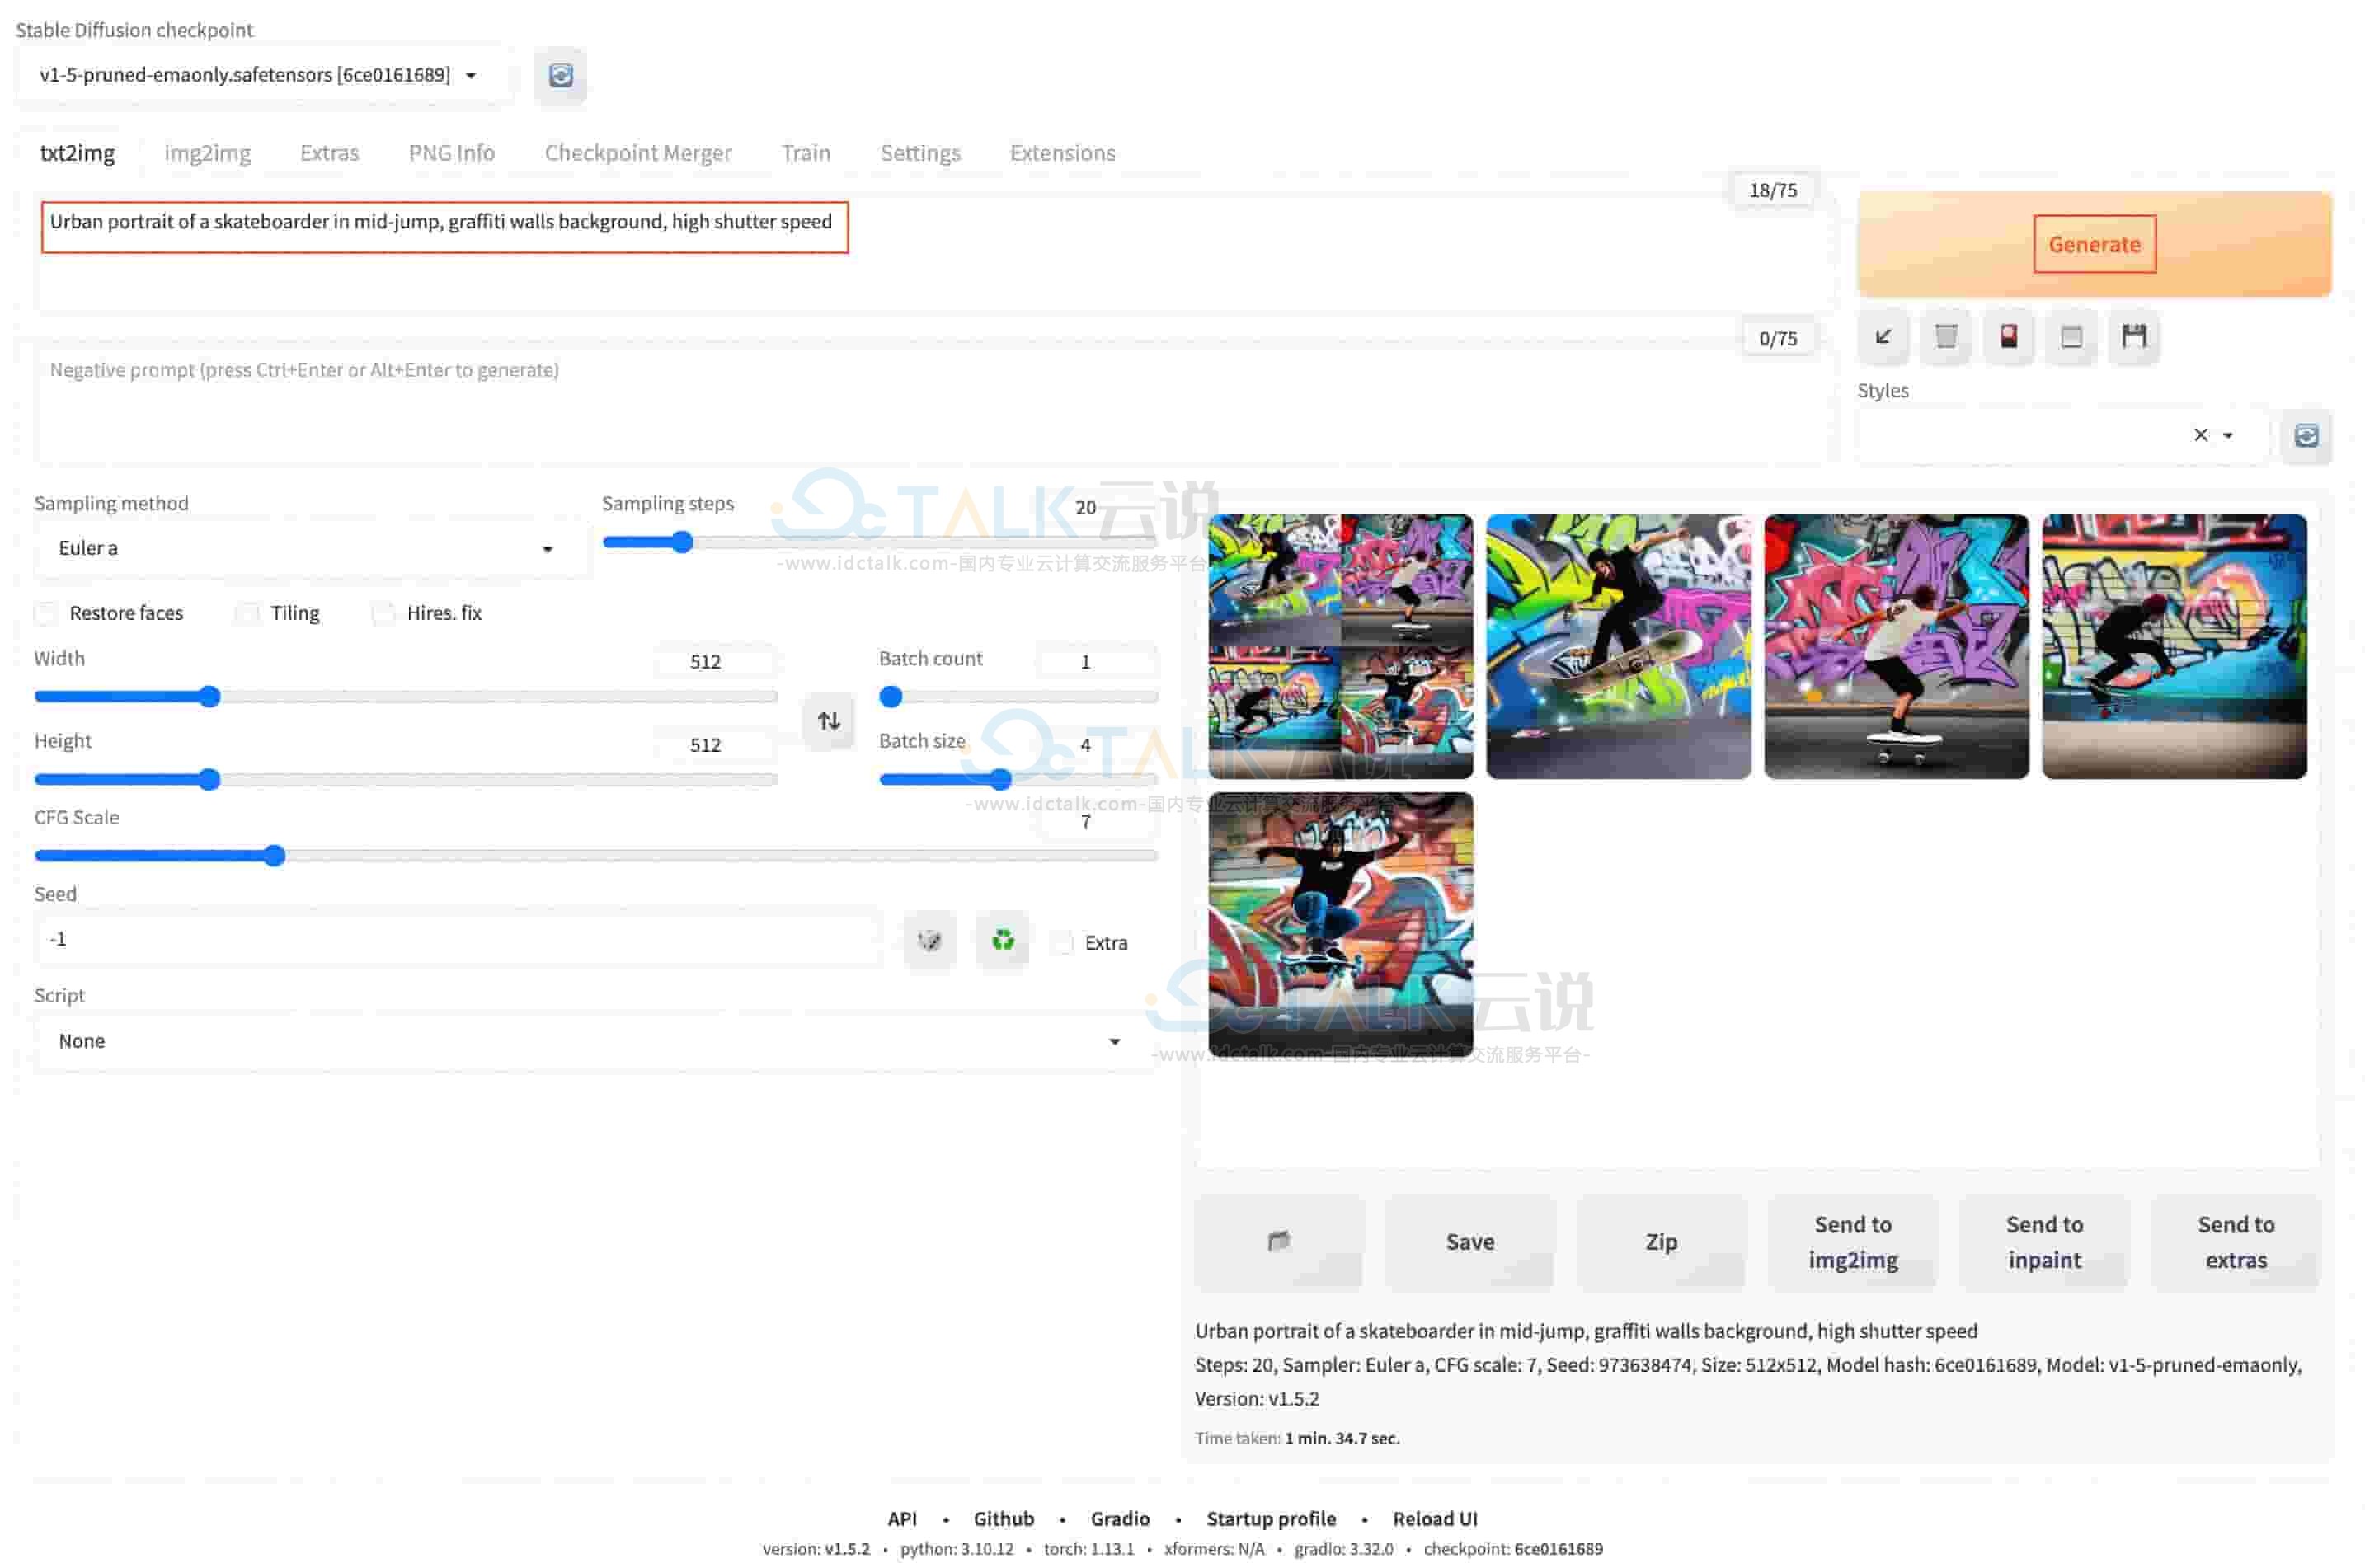
16、在prompt对话框中,输入对话内容(仅支持英文Prompt,例如:Urban portrait of a skateboarder in mid-jump,graffiti walls background,high shutter speed),单击Generate,即可开始AI对话。

自动化部署
1、下载自动部署脚本。
wget https://help-static-aliyun-doc.aliyuncs.com/file-manage-files/en-US/20231213/bild/deploy_stable-diffusion_amd-docker.sh
2、进入容器环境。
sudo docker exec -it -w /root pytorch-amd /bin/bash
3、下载tmux并创建一个tmux session。
yum install -y tmux
tmux
4、为自动化部署脚本添加执行权限。
chmod +x deploy_stable-diffusion_amd-docker.sh
5、运行自动化部署脚本。
./deploy_stable-diffusion_amd-docker.sh
当显示结果如下所示时,说明自动部署脚本已完成。
6、在浏览器地址栏输入http://<ECS公网IP地址>:7860,进入Web页面。
7、在prompt对话框中,输入对话内容(仅支持英文Prompt,例如:Urban portrait of a skateboarder in mid-jump,graffiti walls background,high shutter speed),单击Generate,即可开始AI对话。
相关推荐:


